How to Add a Blog Post to Your Shopify Store
Adding a blog post to your Shopify store is easier than you think! This guide walks you through every step, from creating a new blog, writing compelling content, to publishing it directly on your store.
In this article, we'll look at how to add a blog post to your Shopify online store.
Simply put, a blog is a great way to increase organic traffic to your online store. When you regularly publish useful articles, you start appearing in more search queries where people are looking for information about products or how to use them. This type of content gradually builds trust in your store. Through your blog, visitors can explore your product range and get answers to their questions before they decide to make a purchase. As a result, their interest in products becomes more informed, and it's easier for them to navigate to product pages. Plus, a blog gives you the opportunity to attract new visitors without direct advertising.
Does Shopify Have a Blog Feature?
Yes! Every Shopify store comes with a built-in blogging system right out of the box. You don't need to install WordPress or any separate platform—it's all integrated directly into your Shopify store.
What Can You Do with Shopify's Blog?
Shopify's blogging feature is designed to help you connect with your audience and grow your brand. Here's what makes it great:
Multiple Blogs in One Store
You can create as many blogs as you need for different purposes. For example:
A "News" blog for announcements and updates
A "Journal" or "Stories" blog for brand storytelling
A "Tips & Tutorials" blog for educational content
Rich Article Features
Each blog post you create includes:
Title and content with formatting options
Author attribution
Publishing date and visibility controls
Featured images to make posts visually appealing
Tags for organizing and filtering content (tags help improve searchability and SEO)
Engage Your Readers
You can enable comments on your blog posts and choose how they're managed:
Turn comments off completely
Allow comments with approval (moderation)
Let comments post freely
Easy Content Organization
Use tags to group related articles together—like "how-to," "new arrivals," or "seasonal tips"—making it simple for readers to find what they're looking for.
Built for Discovery
Your blog content automatically works with Shopify's search feature, so customers can find your articles when searching your store. Plus, each blog gets an automatic RSS feed that readers can subscribe to.
Why Blog on Shopify?
Blogging is a powerful way to:
Share announcements and company news
Dive deep into your products and their benefits
Provide helpful content that showcases your expertise
Improve your search engine rankings with quality content
Tell your brand's story and build community
Getting Started is Simple
Just head to your Shopify admin, navigate to Online Store → Blog posts, and start creating! Your blog will match your store's design automatically, keeping everything cohesive and professional.
Whether you're launching your first post or building a content library, Shopify's blog feature gives you everything you need to share your story and connect with customers.
How to Start Publishing on Shopify Blog
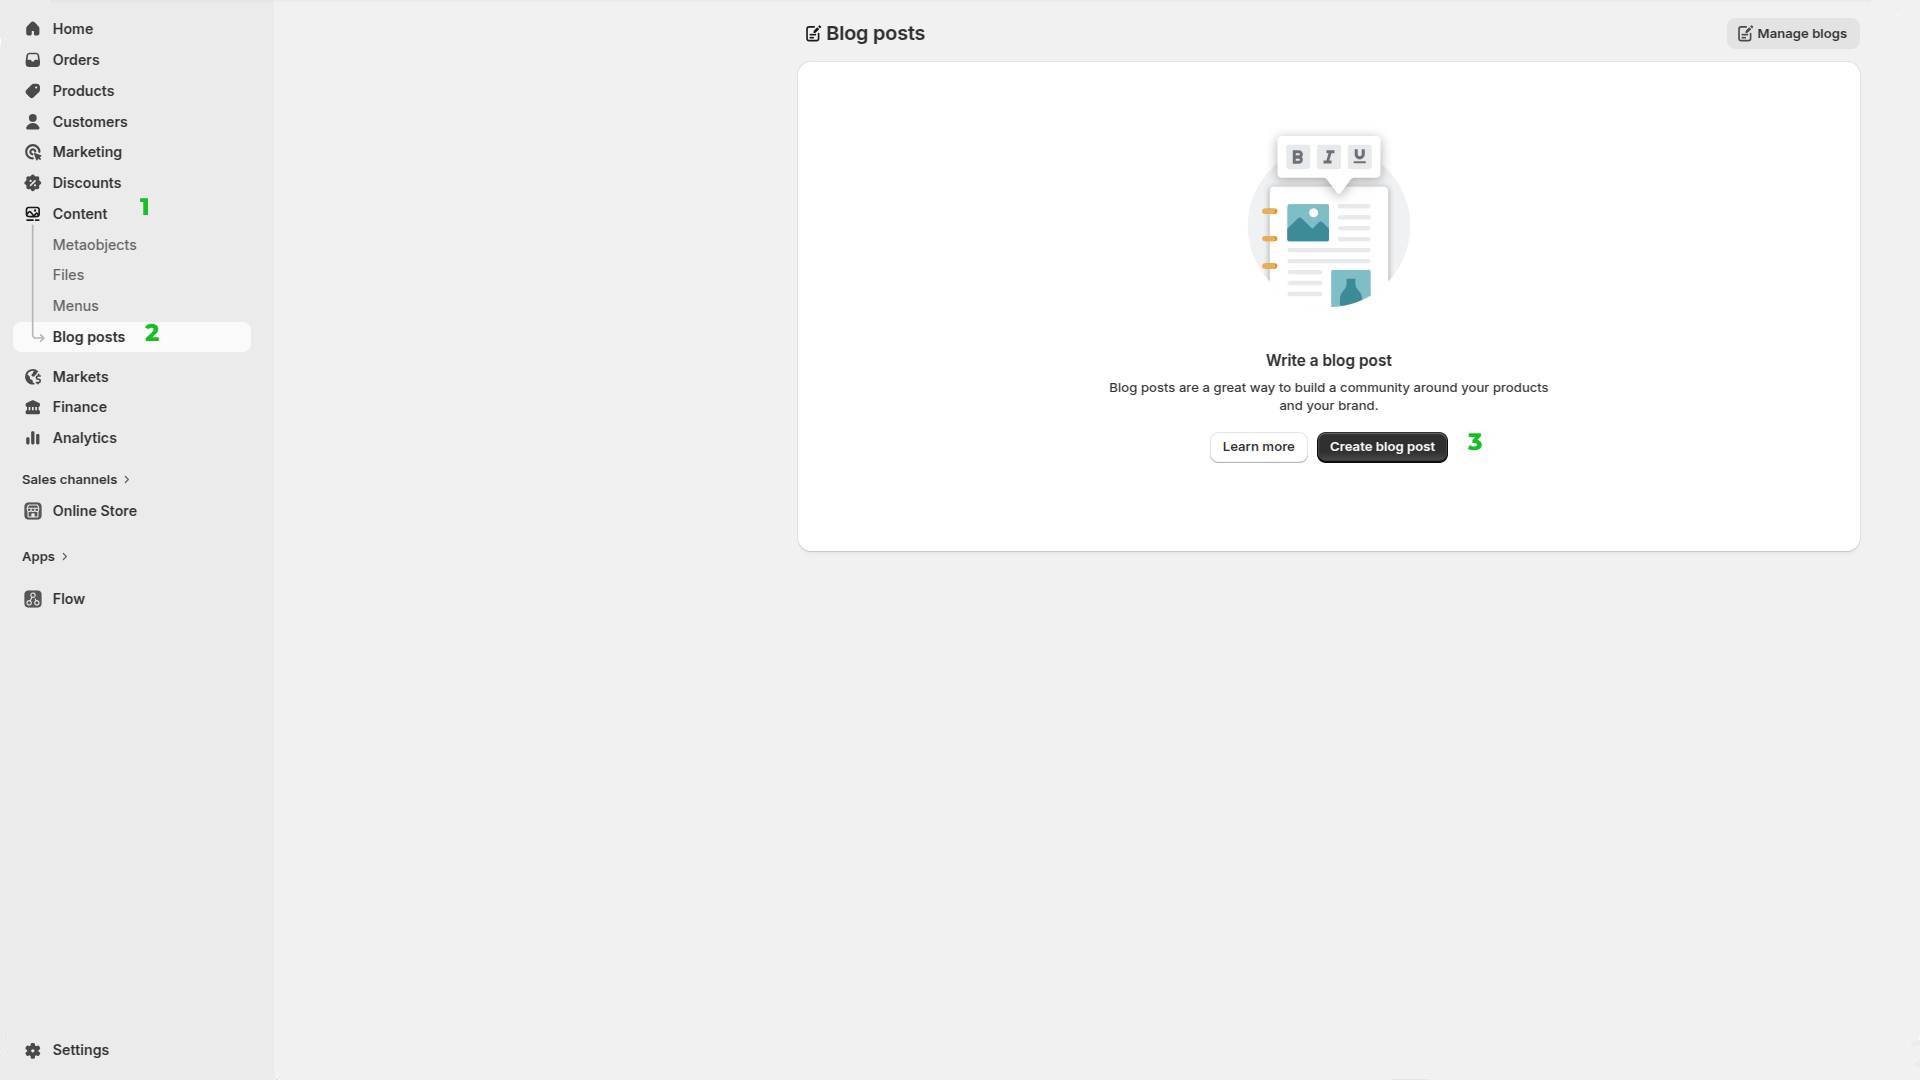
Let's get started. First, go to your Shopify admin panel. Once you're there, we'll create your first blog post. To do this, click the buttons in the following sequence (as shown in Image 1):
Step 1: Click "Content" (Green number 1)
In the left sidebar, locate "Content" with the green indicator showing "1"
Click on "Content" to expand this menu section
Step 2: Click "Blog posts" (Green number 2)
Under the Content menu, you'll see "Blog posts" with a green number "2" next to it
Click on "Blog posts" to open the blog management page
Step 3: Click "Create blog post" (Green number 3)
On the Blog posts page, find the black button labeled "Create blog post" (marked with green number "3")
Click this button to open the blog post editor and start writing your first post
How to Write Your First Blog Post in Shopify
Now you're on the "Add blog post" page (Image 2).
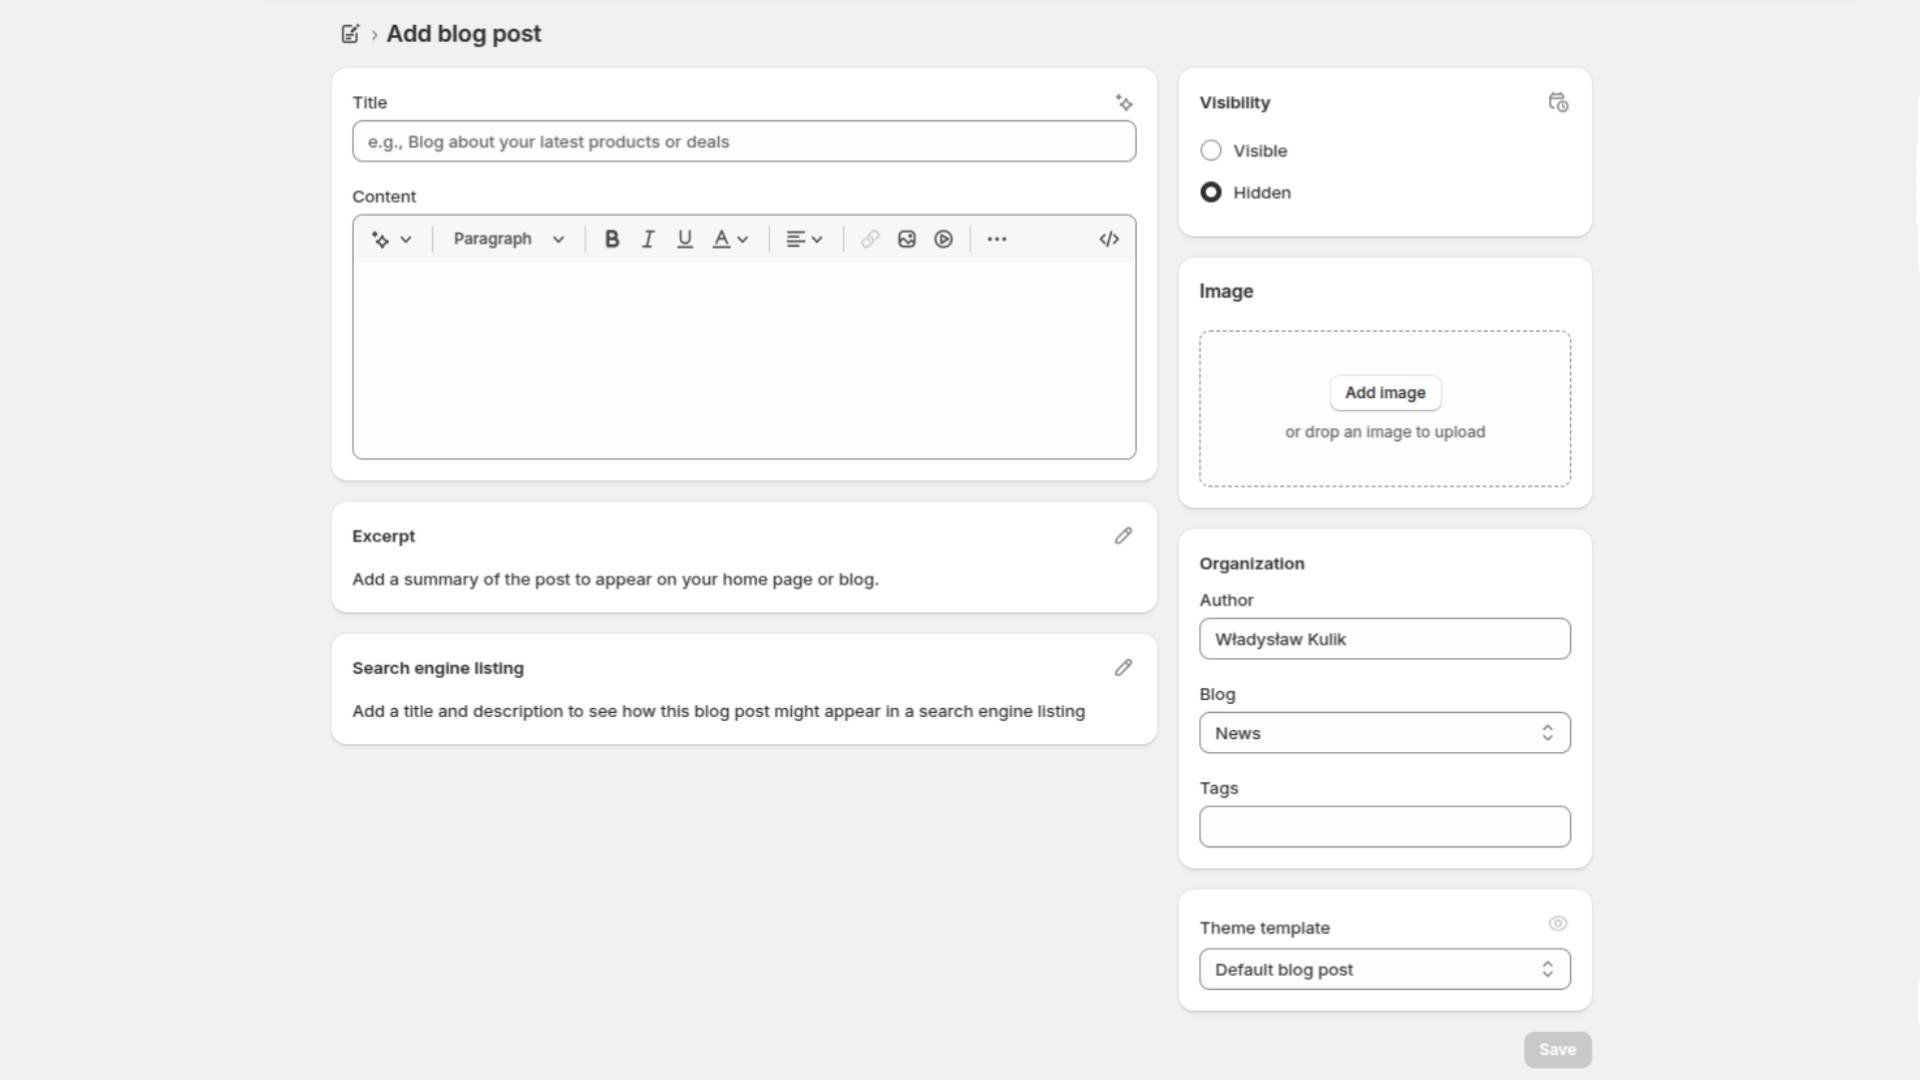
Here's what to fill in:
Main Content Section (Left Side)
1. Title
Click in the "Title" field at the top
Type your blog post title
Example: "Welcome to Our Store" or "New Product Launch"
2. Content
Click in the large "Content" text area below the title
Start typing your blog post
Use the formatting toolbar above to format your text (bold, italic, underline, alignment, links, etc.)
3. Excerpt (Optional but Recommended)
Scroll down to the "Excerpt" section
Click the pencil icon to edit
Add a short summary of your post—this appears on your blog listing page and helps readers decide whether to click
If you skip this, Shopify will automatically use the first sentences of your post
4. Search Engine Listing (Optional but Recommended for SEO)
Find the "Search engine listing" section
Click the pencil icon to edit
Add a custom title and meta description for Google search results
This helps your blog post appear better in search engines and can improve click-through rates
Right Sidebar Settings
5. Visibility
Choose "Visible" to publish the post publicly on your store
Or choose "Hidden" to save as a draft (not visible to customers)
6. Image (Featured Image)
Click "Add image" button in the Image section
Upload an image from your computer, or drag and drop
This image will appear at the top of your blog post and in blog previews
7. Organization Section
Author:
Shows your name (or the staff member creating the post)
Blog:
Select which blog this post belongs to (default is "News")
Click the dropdown to choose a different blog if you have multiple blogs
Tags:
Click in the "Tags" field
Add relevant keywords separated by commas (e.g., "products, news, updates")
Tags help organize your content, improve internal search, and can contribute to SEO by grouping related topics
Final Step: Save or Publish
Once you've filled in all the information:
Look for the "Save" button (usually in the top right corner)
If Visibility is set to "Visible," clicking Save will publish your post immediately
If Visibility is set to "Hidden," clicking Save will save it as a draft for later
Speed Up Content Creation with GoodySell AI SEO Blog
If you want to speed up writing and publishing content on your Shopify blog, you can use the GoodySell AI SEO Blog plugin, which helps you accelerate article writing while incorporating SEO fundamentals.
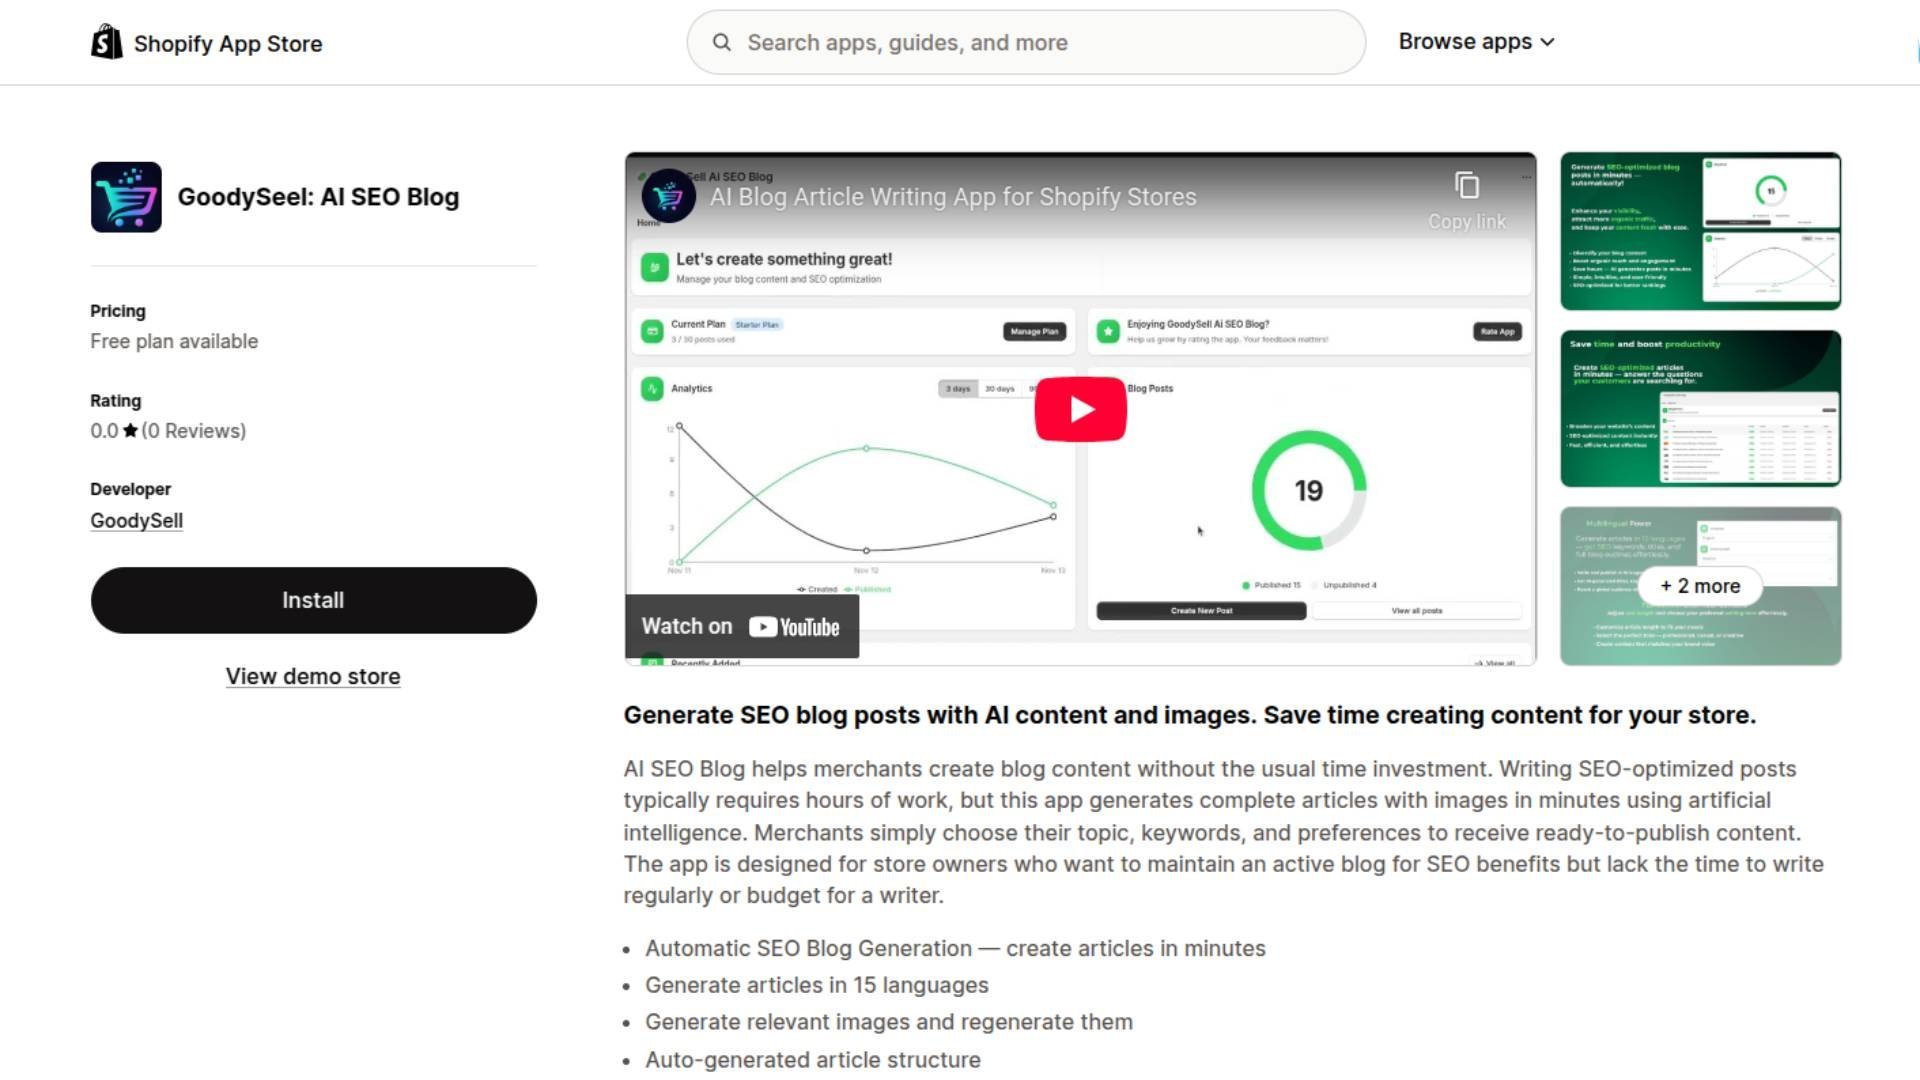
Find the GoodySell AI SEO Blog in the Shopify App Store
You can find the plugin through the client panel by selecting Apps in the search bar and typing "Goodysell," then clicking Search Goodysell in Shopify App Store. This will redirect you to the Shopify App Store where you'll select our plugin GoodySell: AI SEO Blog.

Or you can find our plugin through the Shopify App Store by typing the plugin name GoodySell: AI SEO Blog in the search bar. And then install the plugin.
A new browser tab will appear asking you to authorize 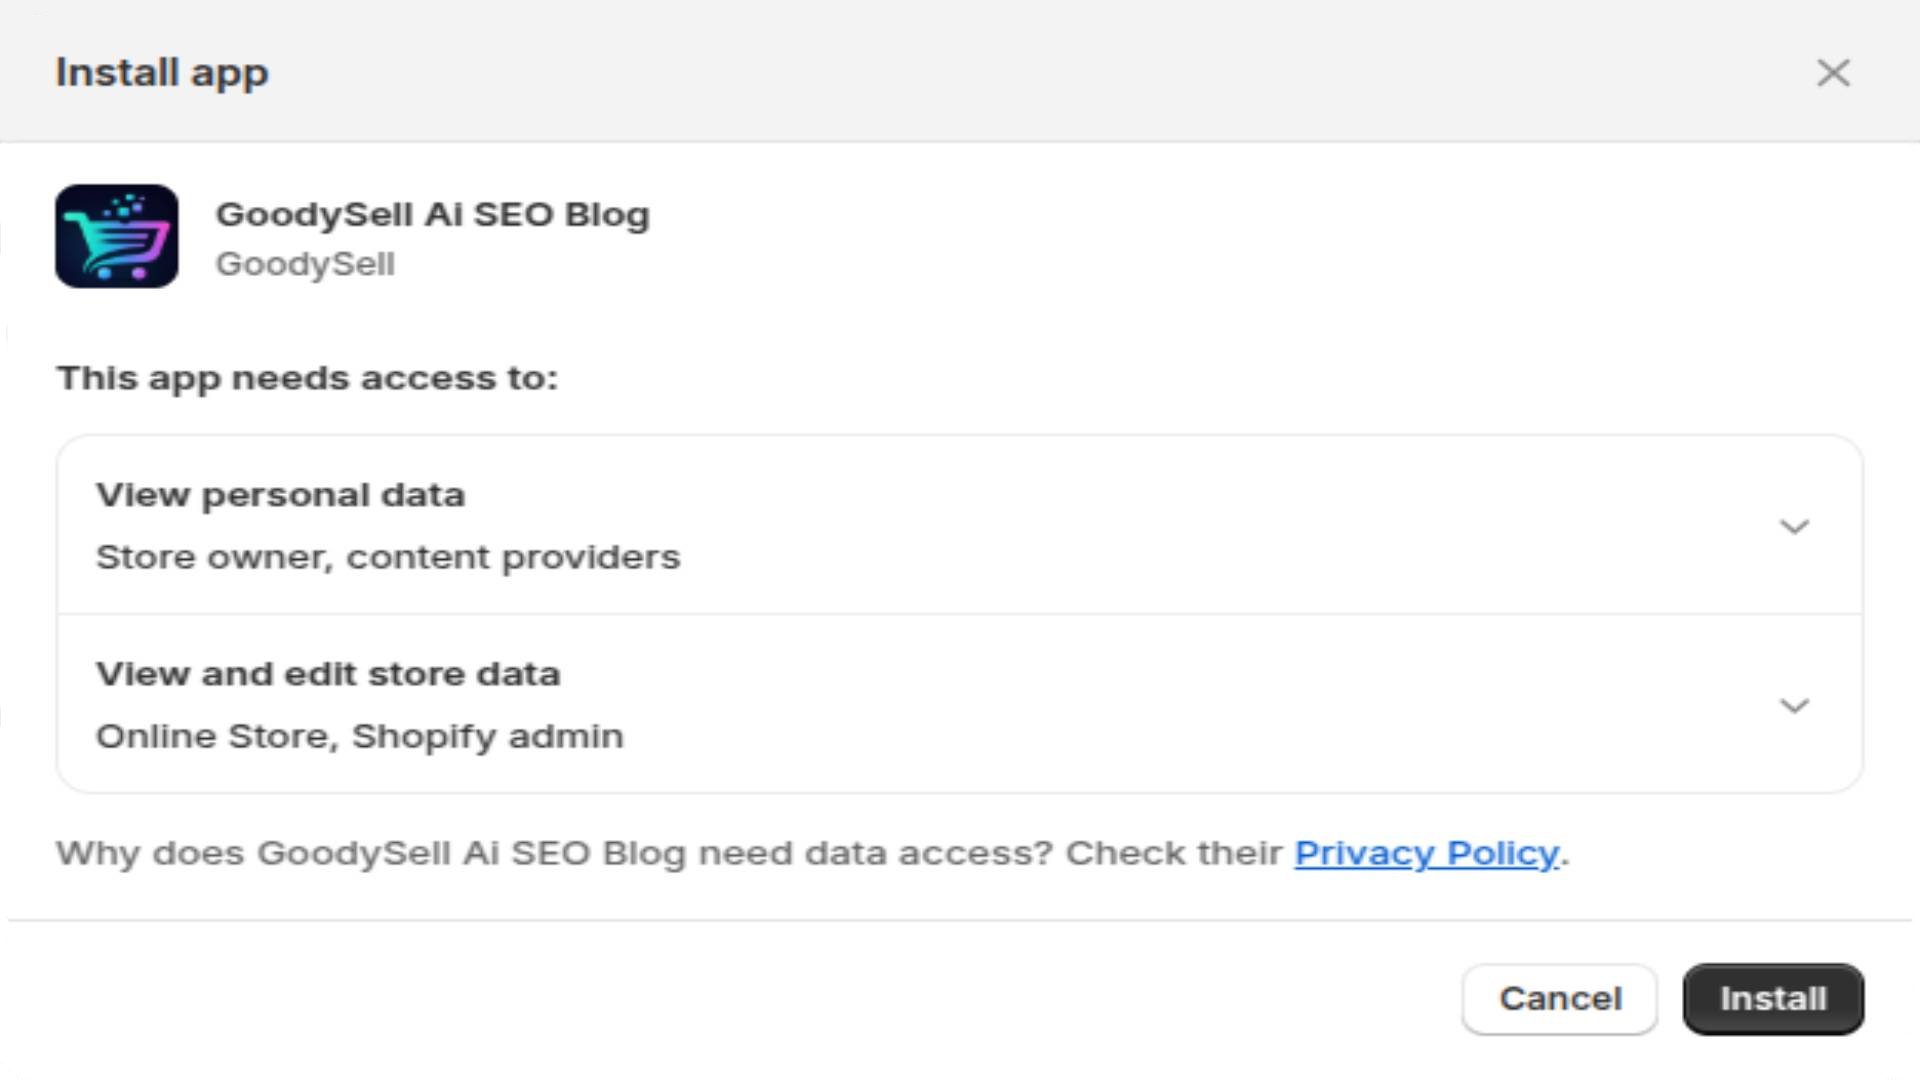 to access your store information.
Getting Started with GoodySell AI SEO Blog
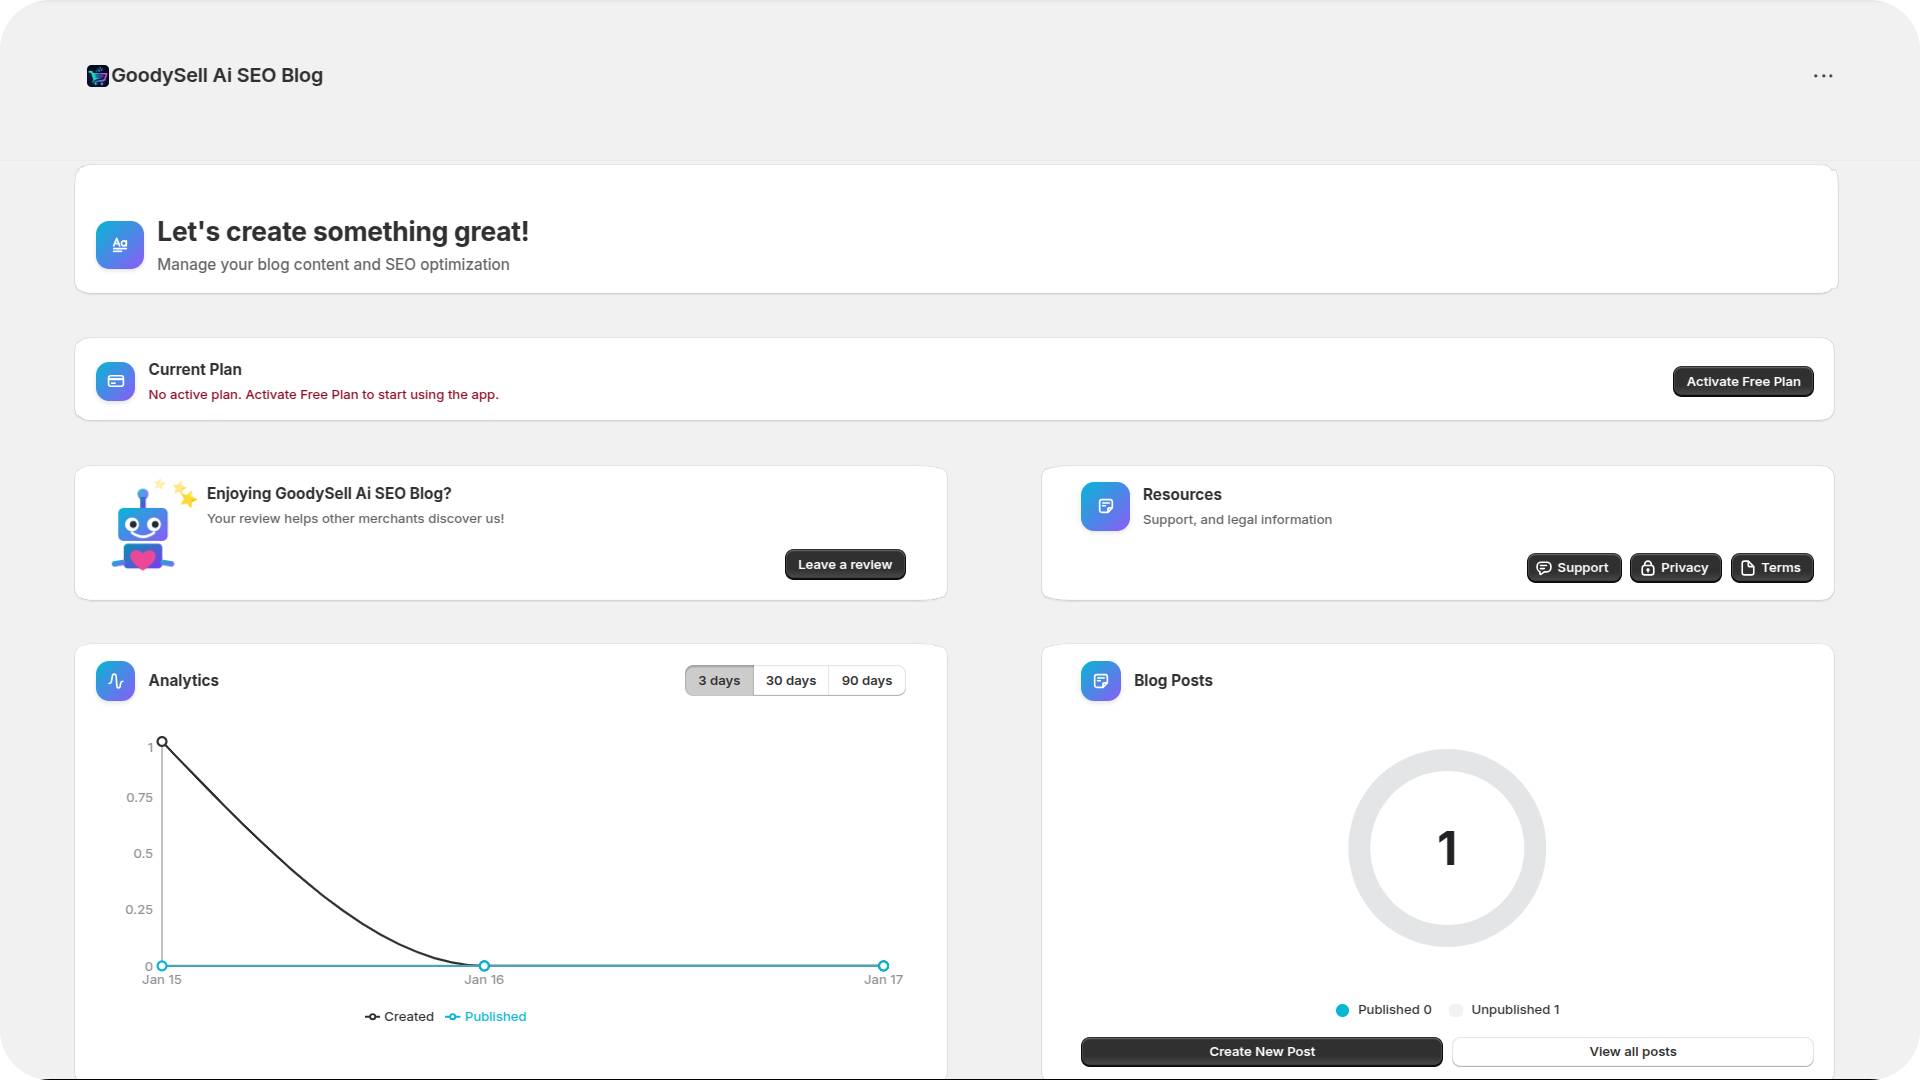
When you first access the plugin dashboard (Image 3), you'll see:

Current Plan Status:
Shows your active subscription plan (e.g., "Starter Plan")
Displays how many posts you've used out of your monthly limit (e.g., "1 / 30 posts used")
Click "Manage Plan" to change or upgrade your subscription
Blog Posts Section:
Shows your publishing status: published posts vs. unpublished drafts
Click "Create New Post" to start creating content
Click "View all posts" to see your complete article library
Analytics:
Track your content creation and publishing activity over 3 days, 30 days, or 90 days
The graph shows "Created" posts (black line) and "Published" posts (blue line)
This helps you monitor your content production pace
App Review:
Click "Rate App" to leave feedback and help other merchants discover the tool
Choosing Your Plan
Click "Manage Plan" in the top right corner to view subscription options (Image 4).

Billing Options:
Pay monthly or pay yearly (yearly plans offer discounts)
Available Plans:
Plan | Price / 30 Days | AI Blog Post Generations per Month |
|---|---|---|
Free | $0 | 2 |
Starter | $0.99 | 30 |
Essential | $19.99 | 60 |
Professional | $29.99 | 100 |
All paid plans include:
SEO-optimized articles
Smart AI image generation
Keyword suggestions (helps improve search rankings)
10 article title ideas
Content generation in 15 languages
Click the "Select" button under your preferred plan to activate it.
Note: Pricing is subject to change. Please verify current rates in the plugin.
Creating Your AI-Generated Blog Post
After clicking "Create New Post," you'll see the post creation interface (Image 5).
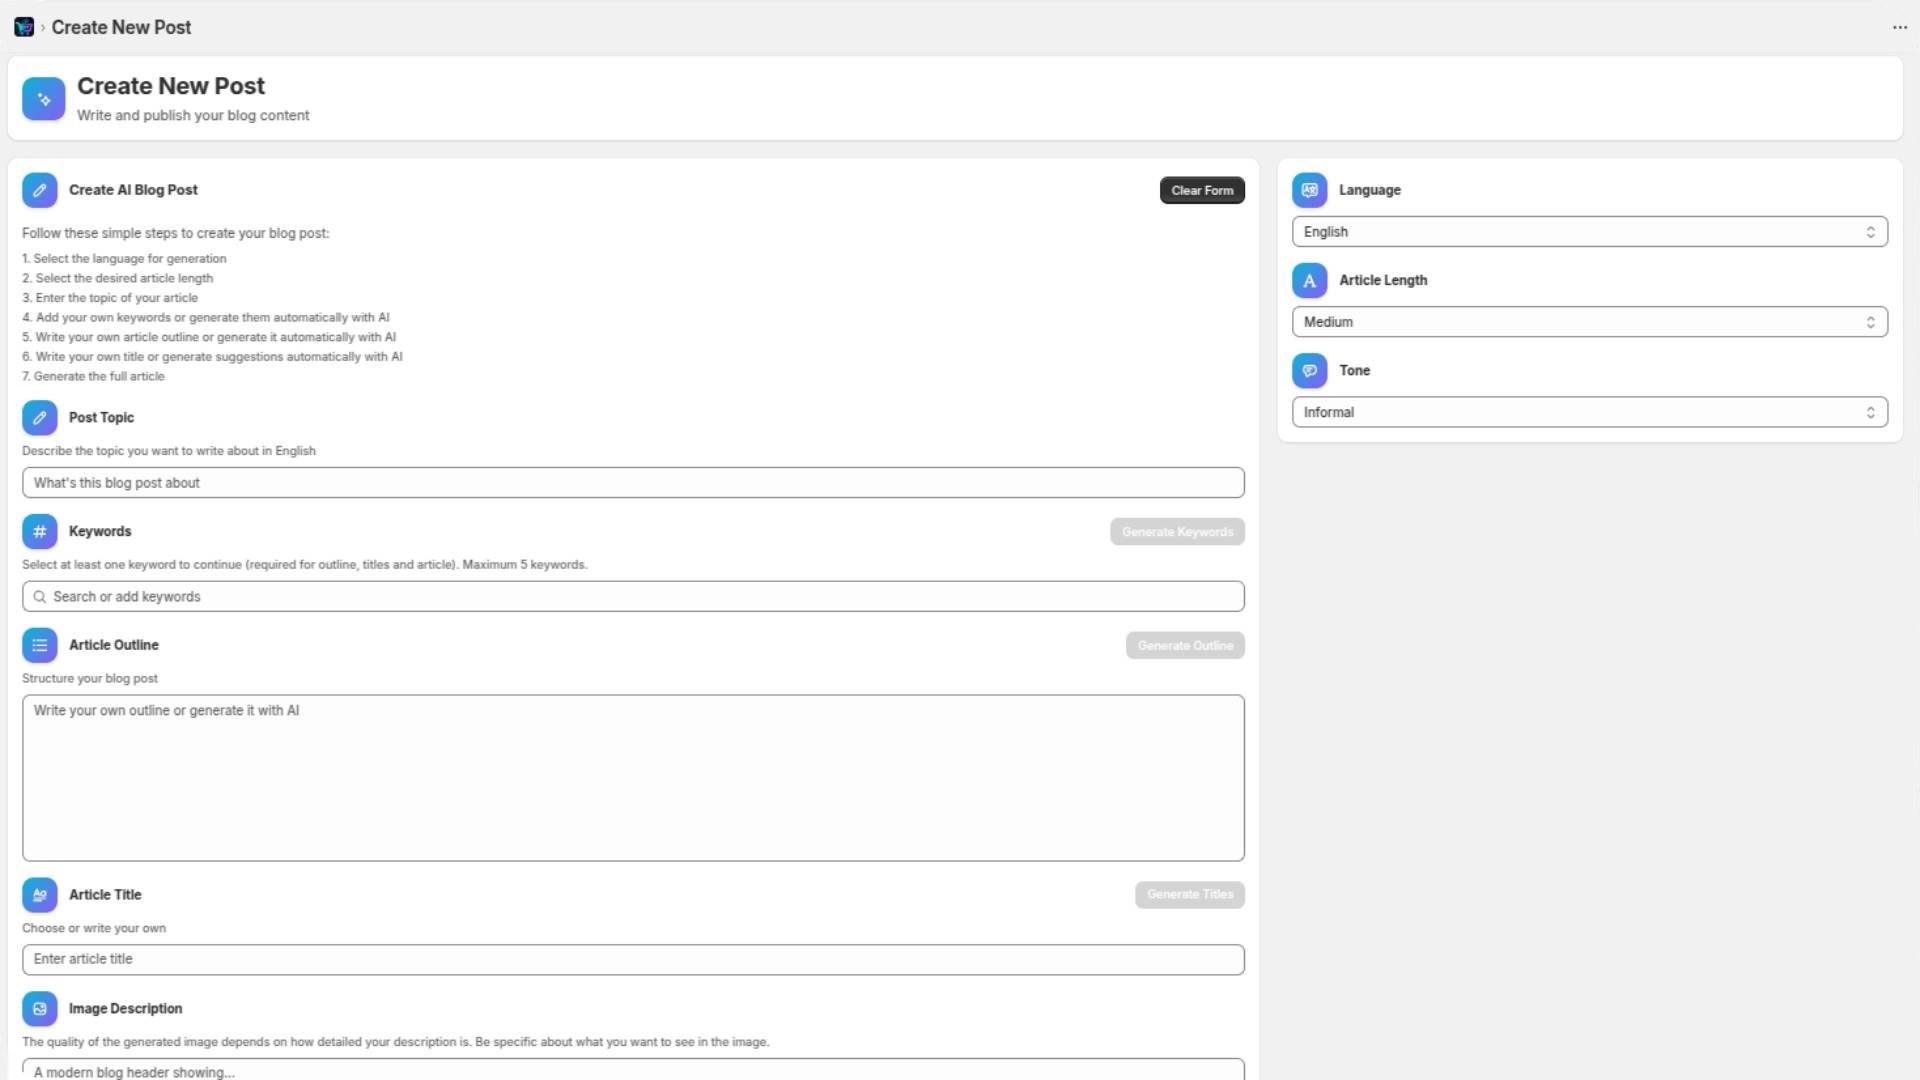
Step-by-Step Configuration:
The left side shows a 7-step process:
1. Language
Select your preferred language from the dropdown (default is English). We support 15 languages including English, French, German, Spanish, Italian, Dutch, Portuguese, Japanese, Polish, Swedish, Danish, Finnish, Norwegian, Chinese, and Korean.
This determines the language of your generated content
2. Article Length
Choose Short, Medium, or Long
This affects how comprehensive your article will be
3. Tone
Select the writing style: Informal, Formal, Professional, etc.
Match this to your brand voice for consistency
4. Post Topic
Describe what you want to write about in the text field
Be specific—clearer topics produce better results
5. Keywords
Enter relevant keywords manually, or click "Generate Keywords" for AI suggestions
Select at least 1 keyword (maximum 5)
Keywords are crucial for SEO—they help search engines understand your content and improve your chances of ranking for relevant searches
6. Article Outline
Write your own outline structure, or click "Generate Outline" to have AI create one
After generating, you can edit the outline to match your specific needs
A good outline ensures your article covers all important points logically
7. Article Title
Enter your own title, or click "Generate Titles" for AI suggestions
Choose a title that's clear, engaging, and includes your main keyword
8. Image Description
Describe the header image you want
Be specific about what you want to see—the quality of the generated image depends on how detailed your description is
Example: Instead of "t-shirt," write "red athletic performance t-shirt on light blue background"
Generate Your Article
Once all fields are completed, click the "Generate Article" button at the bottom to create your SEO-optimized blog post.
You can clear the form anytime using the "Clear Form" button in the top right corner.
Editing and Publishing Your Generated Post
After generation, you'll be taken to the "Edit Blog Post" page (Image 6).
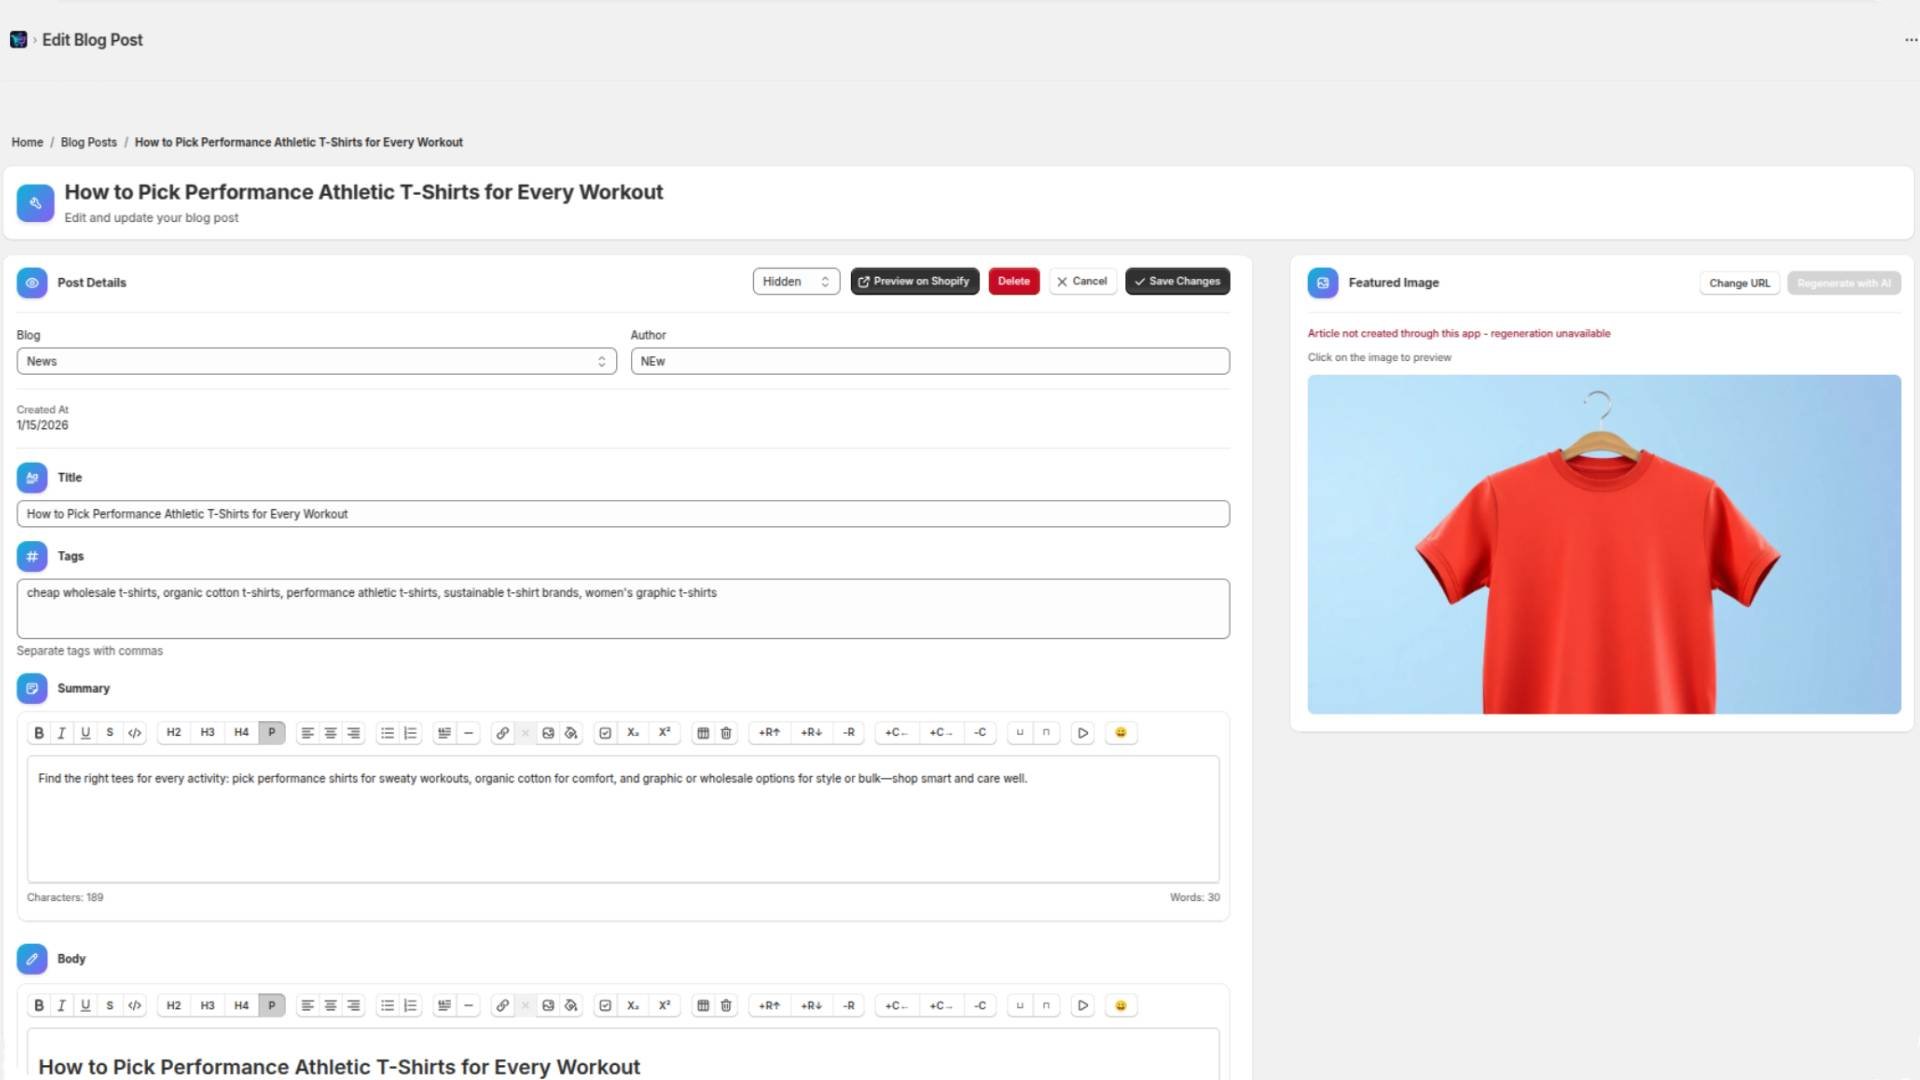
Review and Edit Content
You can review and, if necessary, edit these sections:
Post Details:
Blog category (e.g., "News")
Author name
Creation date
Title:
Edit the generated title if needed
Ensure it's compelling and includes your target keyword
Tags:
Review the generated tags
Tags improve content organization and help with internal site search
Separate multiple tags with commas
Summary:
Edit the post summary (excerpt)
This appears in blog listings and search results—make it engaging
Character and word counts are shown at the bottom
Body:
Review the full article content
Use the rich text editor toolbar to make formatting adjustments
Ensure the content flows well and provides value to readers
Featured Image
On the right side, you'll see the generated featured image.
Regenerating Images:
If the image doesn't meet your expectations, click "Regenerate with AI"
You have 5 regeneration attempts
Remember: The quality of the generated image depends on how detailed your description is
Update your description to be more specific if needed
Alternative Options:
Click "Change URL" to use an image from a different source
Or upload your own image
Preview Your Post
Before publishing, click "Preview on Shopify" to see how your post will look on your live store. This helps you catch formatting issues or make final adjustments.
Publishing Options
Visibility Setting:
Hidden: The post is saved as a draft (not visible to customers)
Visible: The post is published and live on your store
To publish immediately:
Change the dropdown from "Hidden" to "Visible"
Click "Save Changes"
To save as draft:
Leave the setting as "Hidden"
Click "Save Changes"
You can publish it later when you're ready
Final Step
After clicking "Save Changes," the article will be saved with the settings you selected. If you set visibility to "Visible," your post is now live and accessible to customers on your Shopify store.
Conclusion
Publishing blog content on Shopify is straightforward, whether you're writing manually or using AI assistance. The GoodySell AI SEO Blog plugin can significantly speed up your content creation process while ensuring your articles are optimized for search engines.
Remember these key points:
Use descriptive keywords and tags to improve search visibility
Write compelling titles and summaries to attract readers
Preview posts before publishing to ensure quality
Use detailed image descriptions for better AI-generated visuals
Regularly publish content to build organic traffic over time
Have Questions?
Find answers to common questions and learn how to get the most out of our apps.